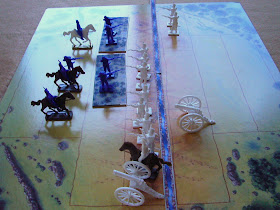
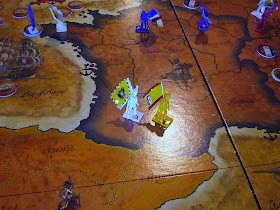
Last year, a couple of my friends and I got together to play Napoleon in Europe's (NiE) Scenario II, The Second Coalition of 1800. With only 3 of us, this meant the player-controlled countries were: England, France and Austria. The campaign started in April, with England, Austria and the Ottoman Empire as allies and--"big surprise here"--France at war with all of them.
Luck-of-the-draw determined who would run each country, minus the Ottomans. Unfortunately, this turned out to be something of a mistake, as the least aggressive player, whom I'll simply call Napoleon, ended up with France. (The other players I'll call Archduke Charles and the ArthurWellesley/Duke of Wellington).
Historically, France was usually at war with two--or often more--of her neighbors simultaneously. In any Napoleonic strategy game, this requires the French player to seize the initiative and defeat his enemies in detail, before all the armies arrayed against him can be brought to bear.
For that matter, the Austrian player shouldn't be a slacker either. A lot of Austrian territory is close to French territory. So Austrian and French armies often start off within "strategic pistol shot" of each other. As a result, France and Austria end up coming to blows right from the get-go.
The 1800 Campaign season started off with the French armies deployed in Belgium, Lorraine, Switzerland and a smaller force in Westphalia. Napoleon had the opportunity to strike the first blow, by driving the Austrians out of Baden-Wurttenburg and overrunning Hanover.
However, Napoleon's previous experience with NiE was that of a defensive player on the fringe, primarily as the Russian player. This was his very first time in the role of the aggressor and looking at the surrounding coalition, he was naturally hesitant on what to do. So he refrained from taking the field, even against England's token force in Hanover.
Archduke Charles on the other hand, wasted no time in attacking the French 3rd Army in Switzerland.
The campaign's first major battle...
...forced the French out of Swiss territory.
Despite the Swiss set-back, Napoleon sought easier pickings in the east. The French 6th Army (Armee d'Orient) marched into Syria...
...and drove out the Ottoman garrison force in a short, but costly skirmish.
As the French were preoccupied with their "l'aventure" against the Ottomans, Wellesley dispatched reinforcements to England's Hanoverian foothold and attacked the French 4th Army in Westphalia.
After a brief skirmish, the 4th Army retreated to Belgium.
England wasn't the only nation that gained reinforcements. Sultan Selim III consolidated several garrisons into the 3rd Army, counterattacked the French survivors in Syria...
...and massacred them.
While Selim was composing a makam celebrating his victory over Franco-infidels, the Austrian 1st and 2nd Armies, breached the borders of France and attacked the French 1st and 3rd Armies.
Both French armies were pushed back to Ile-de-France.
Meanwhile, the Ottoman 3rd Army swept across North Africa.
In an attempt to end the war in one swift stroke, Archduke Charles ordered his 1st Army to attack the French 1st Army, led by Napoleon himself. (According to the rules, if Napoleon is killed or captured the war is over).
Napoleon's force had a 2-to-1 advantage in cavalry, but suffered from a complete lacked artillery. (Napoleon without cannons? Talk about historical irony). To make up for this deficiency, he deployed his army so it was screened by woods in its center and left flank. However, his right flank remained dangling in open terrain.
Keenly observing the French right flank was "in the air," Archduke Charles massed a combined-arms force against the exposed French position.
The Austrian 1st Army crossed the river in the center to pin down the French line...
...and smashed the French 1st Army's weak right flank.
Fortunately, the French cavalry reserve prevented the Austrians from pursuing and allowed Napoleon to withdraw and consolidate the 1st with the 3rd Army near Paris.
June turned out to be a month full of diplomatic shenanigans.
Despite the series of setbacks, Napoleon was able to charm Charles IV of Spain to declare war against the anti-Gallic Coalition. Meanwhile, said Coalition, convinced King Frederick William III of Prussia (or more likely, Queen Consort Louise) to join their crusade of ridding the Continent of the Corsican Ogre.
Despite receiving reinforcements, Archduke Charles feared he didn't have the manpower to take-on Napoleon directly. So he settled for time-honored tradition of ravaging the French countryside instead.
But as he advanced to capture the French Fleet at Brest, the Spanish 2nd Army crossed the southern border to relieve their French friends.
At a border town in Gascony, the Austrian 2nd Army made a stand.
Generals Cuesta and von Wimpffen anchored their respective centers--and their artillery batteries--on opposing hills. But an hour-and-a-half into the fight (assuming each round of combat to represent 30 minutes of real time), the Austrian counter-battery fire drove the Spanish guns from their hilltop position.
With the Spanish artillery silenced, von Wimpffen shifted his battery to his left flank, along with supporting infantry. While at the same time, the Spanish general launched an uphill assault against the remaining whitecoats in the center. After six-and-a-half hours of fighting, the battle now hung in the balance...
...but once again, the right flank was smashed by an Austrian combined arms attack. Fortunately, the Spanish cavalry screened Cuesta's retreat back to the border.
Even with Coalition armies rampaging across France, Napoleon employed his Corsican charisma once again and convinced President John Adams to declare war on his former Britannic overlords.
Warships, along with much-needed infantry regiments were siphoned-off to deal with the Yankees, who were still considered "rebel scum."
Unfortunately, Admiral Villeneuve discovered there were still plenty of His Majesty's ships on blockade duty.
As the French Navy settled to the bottom of the Bay of Biscay, the British 1st Army linked-up with the Austrian 4th Army in Lorraine.
The Royal Navy wasn't the only force active on the high seas, though. The Ottoman Navy landed three bands of raiders on the shores of Andalusia, with the hope of dashing to Madrid.
Surprisingly, the lone Spanish regiment guarding Southern Spain shot two of the raider bands to pieces and sent the surviving one scurrying to Gibraltar.
Meanwhile, north of the Pyrenees, the Prussian 1st Army finally joined the Austrian 4th and British 1st Armies in Belgium.
As this Anglo-Germanic juggernaut gathered, the Spanish 1st Army made one more attempt to push into Gascony.
Unfortunately for the Spanish rank & file, the Second Battle of Gascony was far more lopsided than the first one...
...as they discovered von Wimpffen's reinforcements weren't so wimpy.
While Cuesta and his would-be conquistadors met their end "Over the Hills and Far Away,"...
...the "British" 2nd Army descended from their mountain fortress and advanced on Madrid.
Led by Lawrence of Arabia's grandfather maybe?
And as the Anglo-Ottomans closed on Madrid, the Anglo-Germans converged on Paris. The first to strike, was Archduke Charles' 1st Army.
But Napoleon still had a trick up his bicorne.
He outmaneuvered the Austrians, catching their army between the Grand Morin and Petit Morin Rivers.
(Probably not geographically accurate, I merely included a big and little river of the same name for narrative purposes. What actually happened was that both players rolled on the terrain chart, with the French player getting a river across his entire front--good--while the Austrian player got stuck with a river behind his back--bad--potentially catastrophically bad).
However, all screening movements conducted by the French cavalry left them scattered throughout the region. (In actual game terms, the Archduke Charles played the card listed below).
After a few hours of fighting, nearly all the French cavalry were driven to the rear area.
Neither Napoleon, nor Archduke Charles wanted to cross the Grand Morin while under fire. So the battle petered-out into an artillery duel that lasted less than two hours. Napoleon then withdrew his force under cover of his guns and disorganized cavalry.
The battle ended in a stalemate and Napoleon's 1st Army was still a force to be reckoned with. However, there were three more allied armies marching through Picardy.
Despite Napoleon's ability to keep an army in the field against the odds, Second Consul Cambaceres and Third Consul Lebrun had enough. They decided France could make do with only two consuls and sued for peace.
While the troops weren't quite "home by Christmas, " the war--and Napoleon's political career--were over before the new year of 1801.
The real tragedy was, however, the culinary world would never know of Chicken Marengo.
Final Notes:
I took over 200 photos of our Second Coalition game with the intent of making a YouTube movie or webcomic. But after going through the photos and reflecting on the course of the game, I couldn't motivate myself to produce anything of that magnitude. As I mentioned earlier, when Napoleon didn't take the initiative, the Coalition did and forced the French back to the gates of Paris. It took nine months, but to all intents and purposes, the game was one long retreat for Napoleon, with the occasional Coalition set backs to liven things up a bit.
Not every game we play is an epic, nail-biting, down-to-the-wire struggle. So this sat on my "virtual shelf" until now.
Since I'm still in the process of getting my Studio back to full operations, I started going through my old files to see what fresh content I could provide for this blog. I thought an abridged version of our Second Coalition game would fit the bill for the NiE fans out there still playing and illustrate some examples-of-play for anyone unfamiliar with the game.


Great review! Love those flag decals - wish I could remember who sold them!
ReplyDeleteGreat review! Love those flag decals - wish I could remember who sold them!
ReplyDelete